Waste-Disposal Management
Overview
Screen Type: Workflow
Screen ID: WORKFLOW-019
The Waste-Disposal Management screen functions like the Dewatering screen but is used to manage the distribution of waste in a tank (such as sediment buildup) rather than just water. When a date range is defined, the screen is responsible for providing the supplier throughput for a given tank so the operator can decide how to divide the waste in the tank for billing purposes. The screen can also be used to cancel all waste disposal transactions directly from the Waste-Disposal Management screen rather than canceling all records for a specific tank in a specific period.
Screen Layout
To access the Waste-Disposal Management screen, complete the following:
-
On the TMS7 Home screen, search for 'Waste-Disposal Management' in the home screen search bar.
-
Select 'Waste-Disposal Management.'
-
Alternatively, a user can navigate to this screen using the Manual Transactions menu:
-
Select the Manual Transactions menu.
-
Select 'Waste-Disposal Management.'
-
A user has two options when they first enter the Waste-Disposal Management screen: they can filter to find existing waste disposal records or can add a new record to begin a waste disposal transaction (the transaction code for waste disposals is 552).
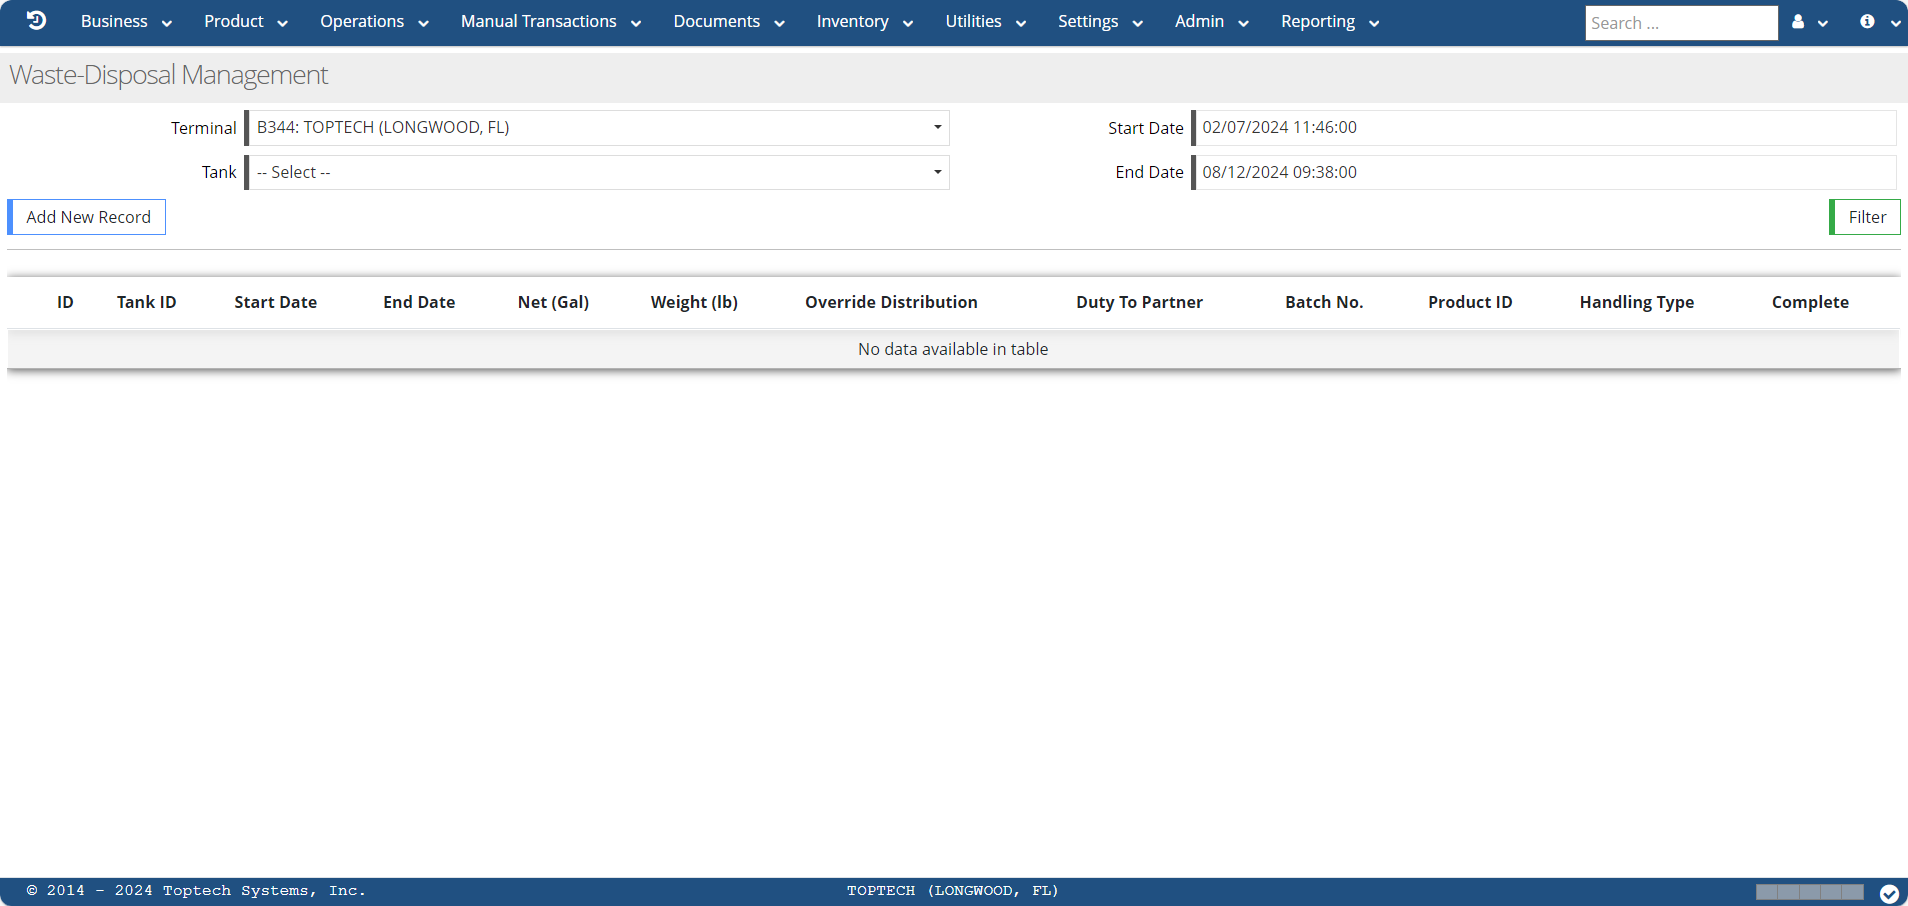
The Filter button allows a user to filter any existing transactions by selecting a terminal, a tank, and a date range. After these filter fields are defined and you press the 'Filter' button, any matching records will appear in the table.
You can also start a new waste disposal record if none exist. To do this, you must first use the filter fields to select a terminal, tank, and date range. After defining these fields, you can select 'Add New Record' to begin a new waste disposal transaction.

You can select the '+' sign to open the 'Record Details' for the new record, which is where you can further define Transaction Details for the waste disposal transaction(s) you are creating.

The sections below will define all of the fields that appear in the record, record detail view, and transaction details.
Record fields
The Record will display information related to the tank and total net volumes and weights of waste in that tank across all supplies who may own the product in that specific tank.

| Field | Description |
|---|---|
| '+/-' button | Selecting the '+' icon will expand the record to show the Record and transaction Detail tables. Selecting '-' will collapse the record. |
| ID | If the record has been processed (i.e. there is a 'Yes' in the Complete field), an ID will be assigned to the record and displayed in this field. |
| Tank ID | Displays the Tank ID and short name of the Tank selected in the 'Tank' filter field. |
| Start Date | Displays the start date selected in the 'Start Date' filter field. |
| End Date | Displays the end date selected in the 'End Date' filter field. |
| Net | Displays the net waste volume in the tank (the unit of measure will vary depending on your system's configuration). |
| Weight | Displays the total weight of waste in the tank (the unit of measure will vary depending on your system's configuration). |
| Override Distribution | If 'Yes' is selected, this allows you to edit the Water Weight and Water Net fields in the 'Record Detail' view. |
| Duty To Partner | Entity that assumes the responsibility for payment of duty/taxes on a movement. The entity selected in this field will update the 'Duty To Number' fields in the Record Detail view to reflect the selected entity. |
| Batch No. | The Batch number if associated with a Tank Batch. |
| Product ID | Displays the product ID of the product stored in the tank. |
| Handling Type |
Select a Handling Type, which is synonymous with the designation of the purpose for which product is used. For EU terminals, this is the same as the tax code. |
| Complete | This field will indicate if the Waste Disposal record has been submitted and processed. Processed records will display a 'Yes' in this field. |
Record Details
The Record Details table provides a view of all of the suppliers who may own product in the tank and could be responsible for distributions in a waste disposal transaction. If there is more than one supplier, transactions will be created for each of the suppliers when TMS processes the waste disposal transaction.

| Field | Description |
|---|---|
| Exclude | If this flag is checked, then the Customer and Account fields are no longer required and the Net and Weight fields are set to zero. |
| Supplier | Displays the supplier associated with the tank and product. |
| Duty To Number | Entity that assumes the responsibility for payment of duty/taxes on a movement. |
| Customer | Select a customer from the drop-down menu. |
| Account | Select an account from the drop-down menu. |
| Destination | Select a destination from the drop-down menu. |
| Net | This field will display the total net volume of product that is associated with the tank supplier. |
| Weight | This field will display the total weight of product that is associated with the tank supplier. |
| Percent % | Indicates what percentage of throughput this supplier is responsible for; it is a percentage of the 'Net' field from the Record View Net field. |
| Water Net | The net volume of waste this supplier is responsible for as it relates to the total Net volume for the tank; all Water Net volume fields for each supplier in the Record Detail view must total to equal the total Net volume in the Record View header Net field. |
| Water Weight | The weight of waste this supplier is responsible for as it relates to the total waste weight for the tank; all Water Weight fields for each supplier in the Record Detail view must total to equal the total Weight in the Record View header Net field. |
Transaction Details
The fields in the Transaction Details table are used to define the specific parameters related to generating the waste disposal transaction(s) for the record.
![]()
| Field | Description |
|---|---|
| Load Start Date | Select the date and time at which the load transaction will begin. This is a calendar and time select field, with times listed in 15-minute increments. |
| Load End Date | Select the date and time at which the load transaction will conclude. This is a calendar and time select field, with times listed in 15-minute increments |
| Comment #1 | Use this field to add any comments related to the transaction, maximum of 40 characters. |
| Comment #2 | Additional comment field, maximum 40 characters. |
| Route Code |
Select a route code from the drop-down menu. The Route Code is an internal routing address that designates where generated documents or data such as BOLs, reports, invoices, transactions, database modifications are sent to be printed, faxed, e-mailed, transmitted, etc. The default route code for printing documents is LPRNT. |
| Folio Month | Select the folio month from the drop-down menu for when this transaction occurs. |
| Folio Number | Select a folio number from the drop-down menu. The options that appear in this field will be determined by which folio month selected and whether that folio is frozen or current |
| Ticket Number | If Ticket Numbers are used with transactions in your TMS system, enter a ticket number in this field. |
| Driver | Select a driver from the drop-down menu. Drivers must already be defined via the Drivers screen. |
| Carrier | Select a carrier from the drop-down menu. Carriers must already be defined via the Carriers screen |
| Mode of Transport |
Select a mode of transport or the type of vehicle that will be used in this transaction. |
| Truck | If the 'T: Truck' option is selected in the Mode of Transport field, select a Truck from the drop-down menu. |
| Trailer #1 | If the Truck uses trailers, select a trailer from the drop-down menu. |
| Trailer #2 | If needed, select a second trailer from the drop-down menu. |
| Save | Selecting this button will save the information in the record but will not submit it for processing (i.e. it will save the changes as a draft but not process the waste disposal transactions). |
| Save and Submit | Selecting this button will save and submit the record, will trigger TMS to process the waste disposal transaction. |
Workflow Procedures
Creating Waste Disposal Transactions
The following example will show the general workflow process for creating a new waste disposal record and submitting it via the workflow screen to create a waste disposal transaction.
-
Navigate to the Waste-Disposal Management screen.
-
Select a Terminal from the drop-down menu.
-
Select a Tank from the drop-down menu. This is the tank you are disposing of waste.
-
Select a Start Date.
-
Select an End Date.
-
Click 'Add New Record.'
-
If the waste disposal record already exists and you just want to edit it and submit it, you could use the 'Filter' button to instead search for the existing record. For this example, we will start with a new record from scratch.
-
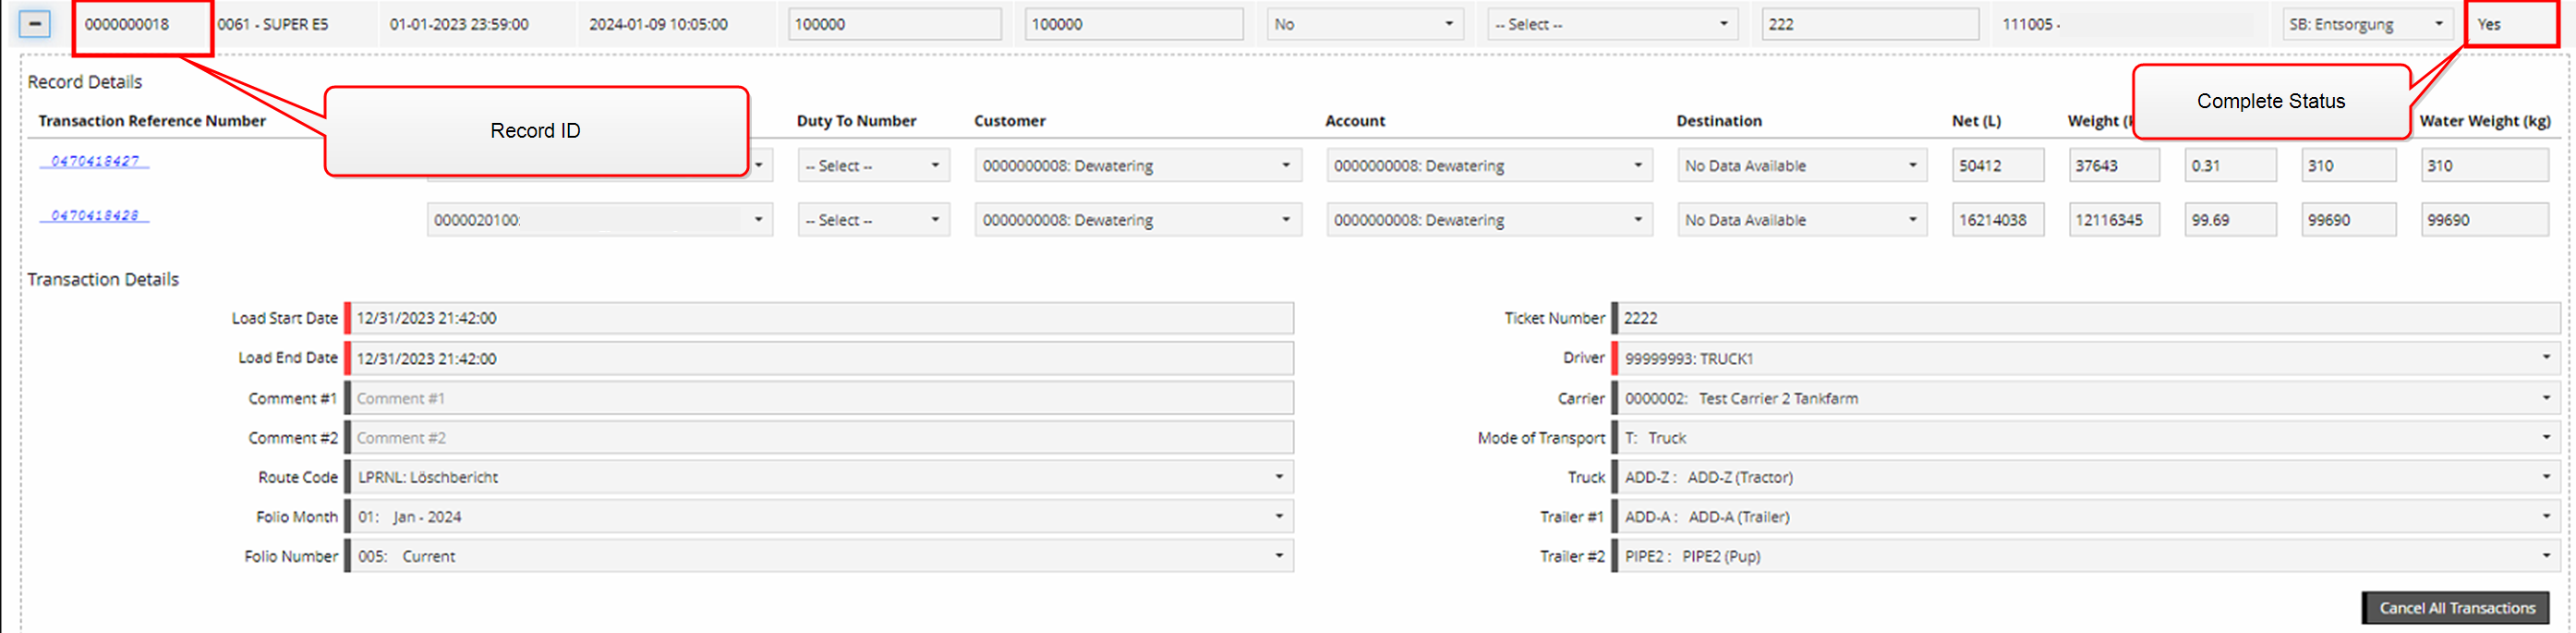
If a record is 'Completed,' then you will not be able to edit an of the data elements. The image below shows a completed record, and all fields are locked.
-
-
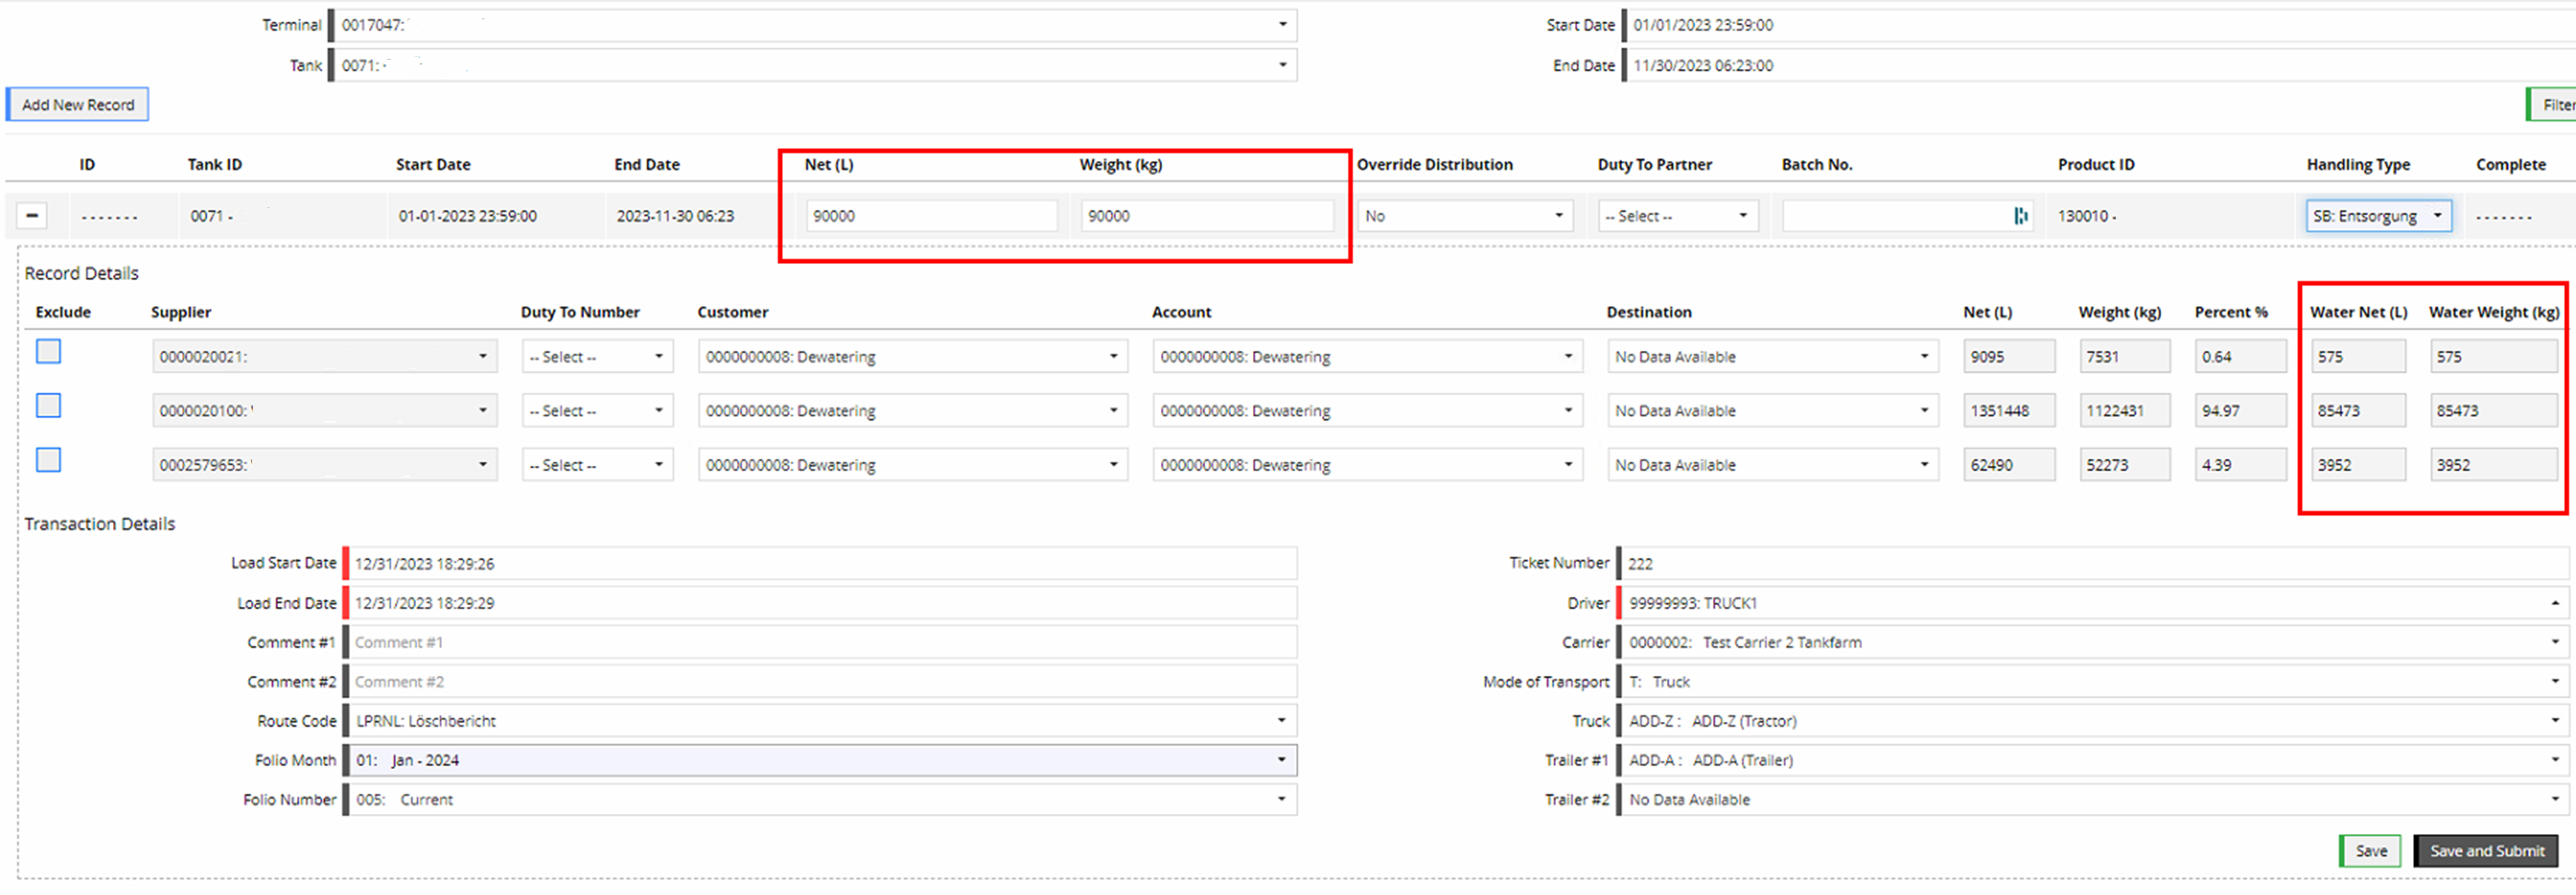
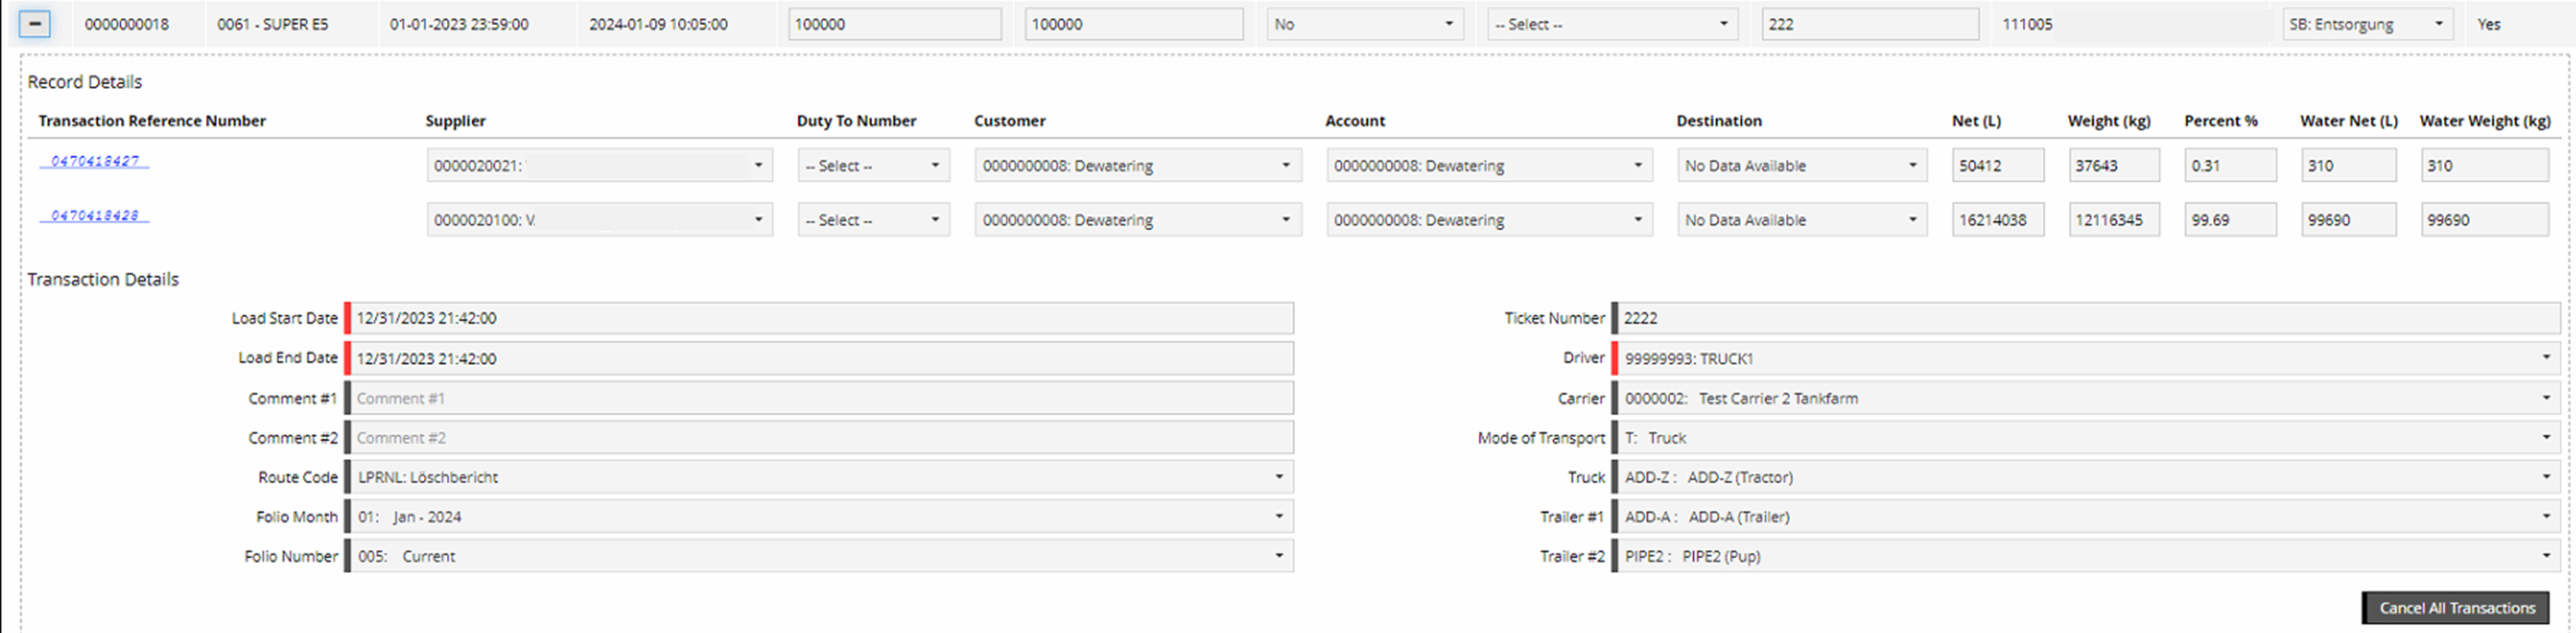
Once the record is added, you can select the '+' icon to view the Record Detail and Transaction Detail view for the record. The Record Detail view will display all suppliers who have product in the tank and what net volume and weight of product and waste they are responsible for; all of the totals of these values for each supplier must equal the total Net and Weight values in the record header.
-
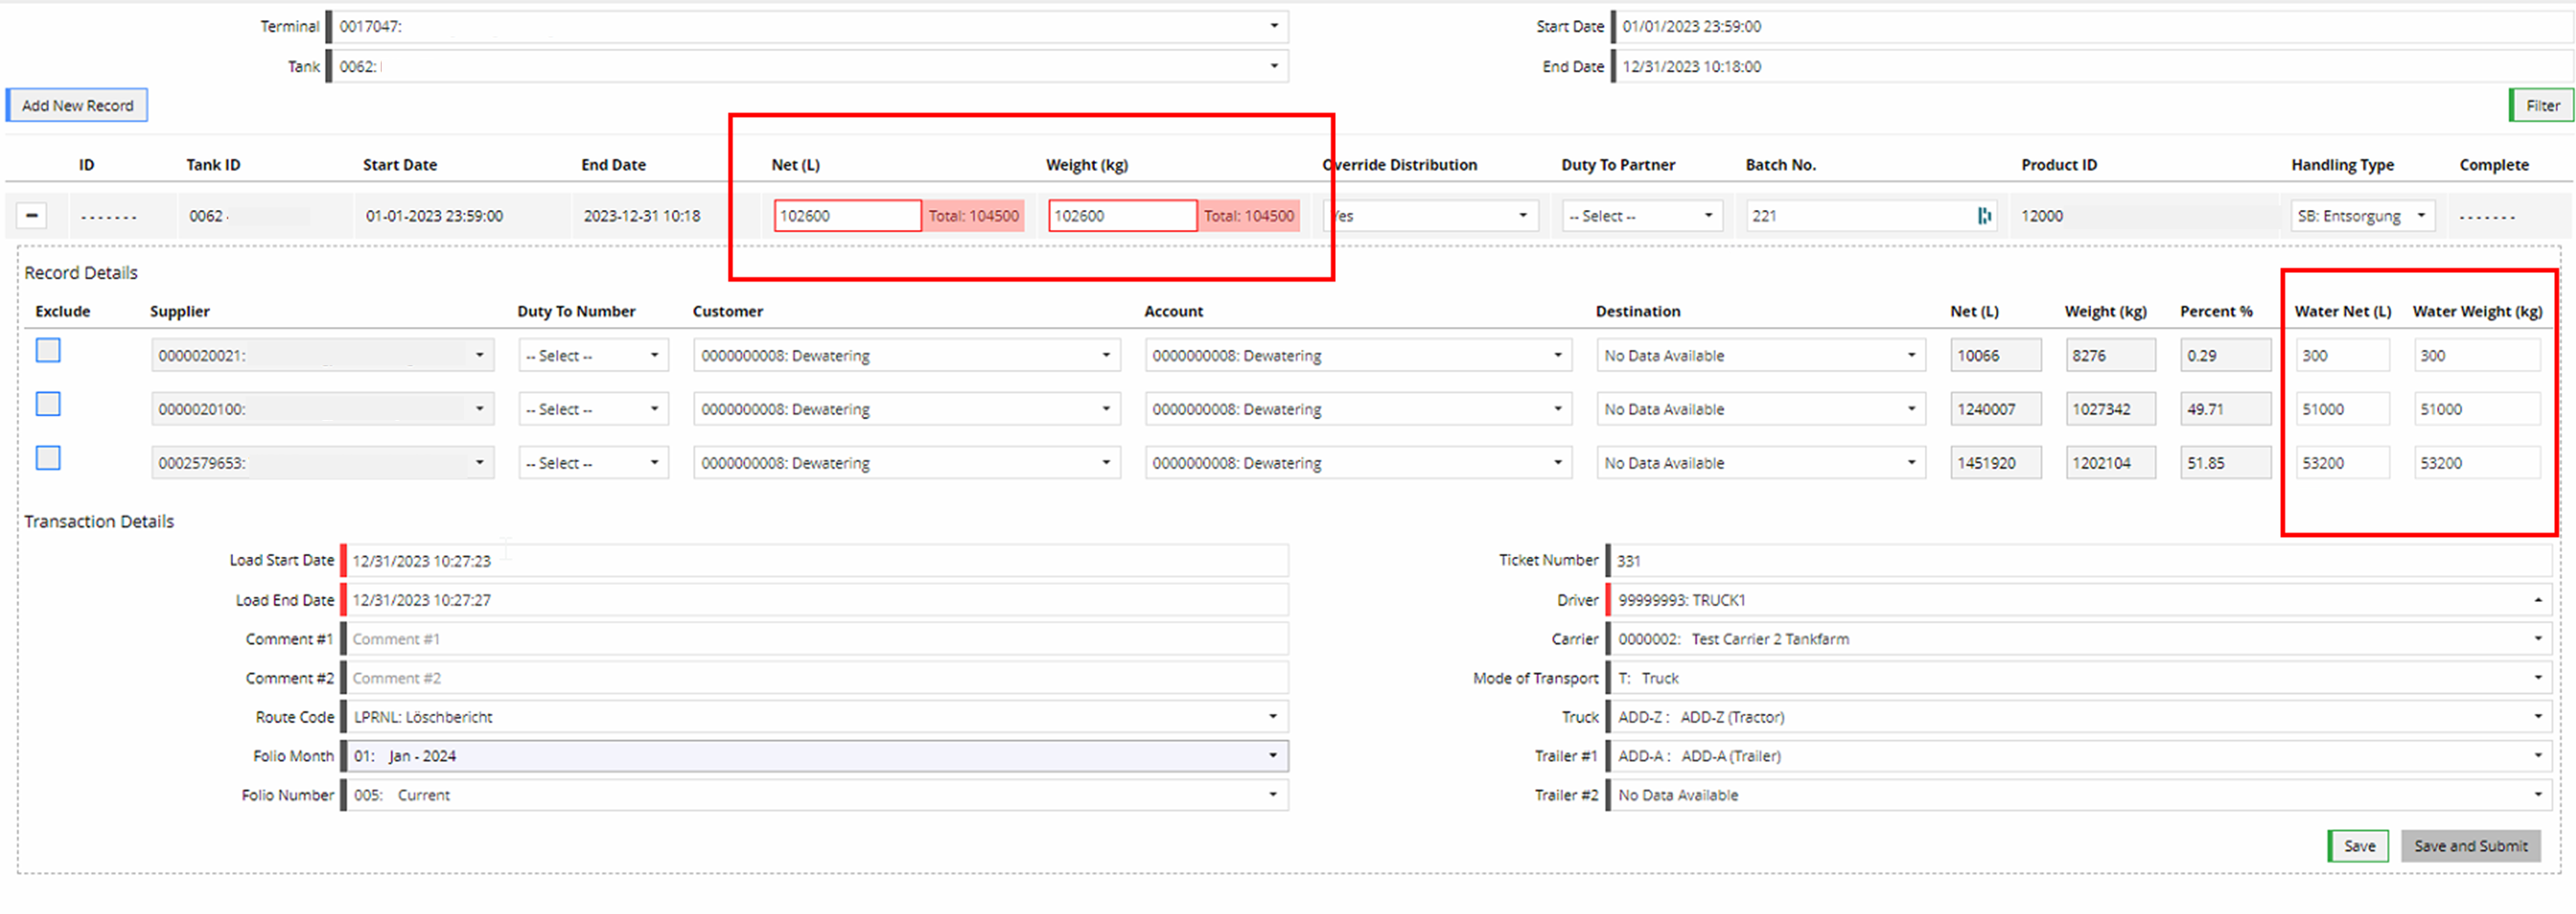
If the 'Override Distribution' field is set to 'No,' you cannot edit the Water Net and Water Weight values for each supplier. If you select 'Yes,' you can edit these fields, but the totals must still equal the value in the Net and Weight record header fields. If the totals do not add up, you would get an error notification and would be unable to submit the record:
-
Fill out any desired fields and ensure that all net and weight values are properly distributed in the table.
-
In the Transaction Details table, fill out the desired parameters for the transactions that will be created for each of the suppliers listed in the Record Details table.
-
After all required and optional fields have been configured, you can click 'Save and Submit' to submit the transactions.
-
Once submitted and processed, the record will now display an ID and the Complete column will display a 'Yes.'
-
In the Record Details table, a transaction reference number will be displayed that contains a smart link to view the transaction in the Transaction Viewer.

Canceling Waste Disposal Transactions
You can use the Waste-Disposal Management screen to cancel waste disposal transactions. Since multiple transactions could be created for a waste disposal record if multiple suppliers are responsible for product in a tank, the Waste-Disposal Management screen provides an efficient way to cancel all of these transactions from the Waste-Disposal Management screen rather than individually cancelling each transaction in the Transaction Viewer. The general workflow for canceling waste disposal transactions is described below.
-
Navigate to the Waste-Disposal Management screen.
-
Use the filter fields to locate the desired Waste Disposal record.
-
Ensure that the record has been processed; this is indicated by the record having an ID and the Complete field being flagged as 'Yes.'
-
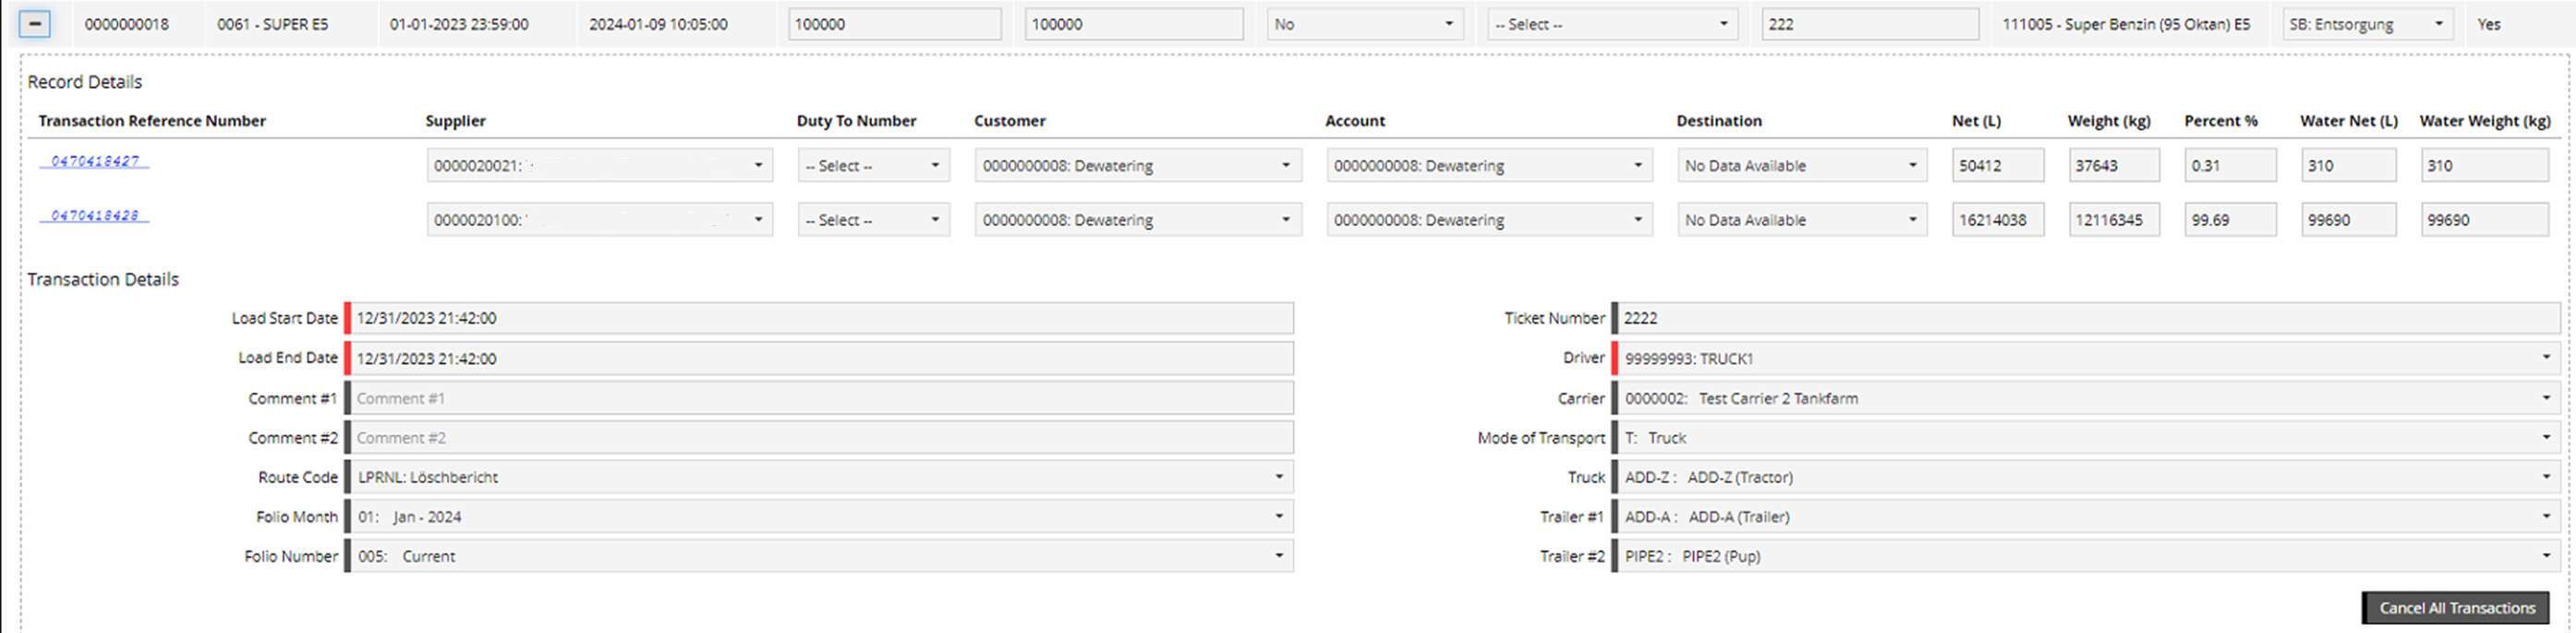
Select the '+' icon to open the Record and Transaction Detail views. You'll notice that there are Transaction Reference Number smart links for each supplier listed in the Record Details table, and that all fields have been disabled for editing.
-
Select 'Cancel All Transactions' to cancel the transactions listed in the Record Details.
-
Note that if you want to Cancel and Rebill these transactions, you must do so via the Transaction Viewer. The Waste-Disposal Management screen can only be used to Cancel transactions.
-
-
Cancelled Transactions can be viewed in the Transaction Viewer, identified with the 'Cancel' label and negative values for the Volume and Weight fields. For more information on using the Transaction Viewer and the Cancel or Cancel/Rebill process, see Transaction Viewer.